Showing posts with label Review. Show all posts

Wednesday, 21 October 2015

Kickstarter Find: Foldio2 Review

For a long while, I was dissatisfied with my hobby photography setup. It was awkward to use, and I couldn't seem to apply enough light to my painted minis, despite lugging my painting lamp up to he loft each time I wanted to take some snaps of my latest work. 

The lightbox offerings on places like Amazon were uninspiring each time I browsed, looking cheap and flimsy. But the Foldio2 Kickstarter piqued my interest. A simple, nicely designed collapsible light box with LED lighting, a second kickstarter was being run for a refreshed, larger design. Not particularly cheap by any means, at $65 plus shipping but I'd read good things about the first product and Kickstarter campaign.

And once again, OrangeMonkie delivered, pretty much on schedule. In a sleek box, that happily avoided customs charges, my light box, a choice of backgrounds and storage bag.


Opening it up, it's made in light but durable white plastic sheeting, and held together with quite strong magnets. These magnets hold it together when packed, and hold its shape when constructed.


It's a doddle to build up, just fold out and form an open-sided cube with the recessed magnets. There's a flap to stick one LED light strip at the top, and more magnets to hold your backdrop of choice in place. The backdrops are a nice matt felted paper.


The Foldio2 is a decent size to photograph even the largest miniatures - at 15" square, I think it'll take squads, vehicles or monsters easily. With a 28mm miniature for scale:


This shot was taken with just one LED strip, and the set came with two. And of course you can add further lighting if that's not enough. The LEDs are really bright and come with a dimmer switch built in. Both attach to a transformer with a choice of plugs, so should be usable worldwide. Each also had a light diffuser, meaning the Foldio2 claimed many improvements in the LED setup from the first Foldio.


One LED strip stuck in place on the top flap - you can see how the three side-panels overlap and are glued by the magnets. 

I've been using Foldio2 for a few months now and am really satisfied (look back and note the switch from my usual blue to grey background from July). I've found I can get more light, more evenly on the miniatures and am less reliant on pointing bulky lamps at small miniatures to get a decent shot, all the while struggling to reach the camera. It folds up and down easily for storage if needed. Simply, it does exactly the job I was looking for it to do. And it is durable and nicely designed. I've not tried OrangeMonkie's own photo-editing app to go with it, sticking with the reliable Snapseed for now.

I do have a few niggles with it. First, the magnets are held in recesses with white stickers, and a couple of mine have popped out. And of course, once a sticker has come off, it's never as strong. So sometimes when packing up/down, there's a game of 'find the misplaced magnet' to put back in its recess.  Second, the set comes with two LED strips, which is great (there was a four LED option too). But there's only one logical place to stick the LED strips and it seems wasteful to have them both on that flap. I've found that holding the second just above the camera's lens gets a great even light, though is a bit awkward. There is a bottom flap but I think having it that low it sheds too much light on the shadowed portion of the miniature and washes them out too much. I'm worried that the LED strip isn't durable enough for me to keep manhandling in this way. Thirdly, I'd have really appreciated a pale blue backdrop to be included - that's my colour of choice. The set came with black, white, green and grey. You could use any paper-thin background of the right size, but the ones provided are a nice photo-friendly paper. At some point I fancy making/buying a terrain backdrop to fit it and blue would have been great for that too.

I'd heartily recommend it as a solid option if you're looking to improve your hobby photos. The Korea-based company OrangeMonkie have created a good, well thought out product and fulfilled two Kickstarters on a large scale, on time - very impressive! But it does cost a good few pennies so is definitely a hobby luxury, for those of you trying to get the best photos of your work that you can. With the Kickstarter long over, it's  available at OrangeMonkie's website.

And, for reference, his was my old homemade backdrop, made from  cardboard box and some sheets of card as backdrop:


A significant improvement, all in all! I'd be interested to see other people's solutions. 

Tuesday, 4 February 2014

Book Review: The Forgotten Front 1914-18 by Ross Anderson

I was kindly sent The Forgotten Front by Dave from a giveaway at One Man and his Brushes and it is probably not one that I'd have read otherwise. WWI isn't a period that I game and the East African campaign is something that I would have confessed to knowing little about. Well, I'm much better informed having read this thorough history.


The book starts with a strategic overview of the relevance of the campaign, touching on some of the key political aspects, logistical matters, the main forces at the start of the campaign and their equipment. This is succinct, interesting and useful. It then ploughs straight into a campaign-by-campaign narrative, which is understandably the bulk of the book.

The text is well written and easy to read, especially considering that this is quite a heavy and detailed history, though there is fair use of acronyms. Aiming to be the first full history of the conflict, the campaigns are covered in depth, but definitely have a strategic focus. This is not a book that gives much insight into the engagements themselves, which is done so well in books such as Michael Asher's Khartoum. This is understandable due to the length of the campaign and as few of the engagements seem to stand out as worthy of such treatment. So it doesn't provide much of a tactical view of any engagements that can be so inspiring and proved such food for designing scenarios.

The effect of political changes on the conduct of the campaign both in terms of pressure ob the commanders and logistical support are well covered for the British, though less so for the German, Belgian and Portuguese. The book contains plenty of analysis and seems to present a relatively balanced view of the British and German sides, which is refreshing. The author clearly has a high opinion of the Schutztruppe and their commander, Paul Von Lettow-Vorbeck. The terrain and climate presented numerous challenges to all sides and this is well emphasised. In fact, the issues caused by disease, rough terrain, lack of infrastructure, logistical difficulties, the tsetse fly and ravages of the rainy season become almost a mantra, as the are repeated so many times throughout. But these doubtless had a massive impact on the results of the campaign and of course heaped miseries on the participants.


Schutztruppe C-in-C Paul Von Lettow-Vorbeck at a parade in Berlin, 1919. Image credit

Curiously, the conclusions and epilogue that end the text are tiny in comparison to the detailed account of the campaigns - just five pages in total from 300. This gives the impression the end is rushed and it just reiterates many of the points previously made. I'd have appreciated more thorough closing thoughts, perhaps drawing out  impact in the immediate aftermath and into the post-colonial period. The book ends with 50 pages of bibliography, notes and an index that one may find useful. This is testament to the thorough research that has clearly gone into the book and would of course be very useful to those with a more serious or academic interest.

As you may have gathered from previous reviews, I like maps and pictures. Well, The Forgotten Front is well-served on the latter, with a centre section of 16 pages of black and white photographs covering key protagonists, units and small engagements. I'd have preferred these spread through the book in two or three sections rather than coming across them all in one go, but they are welcome and very useful, nonetheless. Despite being black and white, they give a good idea of the uniforms of the various contingents as well as the terrain, both of which would be very useful for the wargamer.


Lt Gen J L van Deventer (centre), General Officer Commanding Imperial Forces, 1917-1918. Image credit

There are quite a few maps scattered throughout the book too. However, these are quite small, sometimes just half a page, black and white and don't have particularly strong design or definition. I struggled at times to decipher the maps and match the movements of the forces shown with the narrative, I'm not entirely convinced they were placed in the right points in the text. Also the place names that are used in the text often aren't used on the maps. Some knowledge of the region or other reference material would come in useful. It is likely that the problem stems from the size of the area of operations over the campaigns. I think some higher quality, full page maps in colour would have been good.


An example of one of the maps

For a wargamer, the book certainly provides plenty of material and would definitely be useful if you wanted to campaign it. I can't imagine there is much more material available in print - the author's foreword touches on this and provides some further reading. I imagine gaming the campaigns in East Africa would be quite interesting, similar to Darkest Africa but with more technologically balanced forces as well as more scope to use artillery, mortars, light machineguns and aerial assets on the table. Certainly different to the trench warfare of the Western Front and the East African campaign would also have the distinct benefit of having considerably smaller forces! Two Fat Lardies' Through the Mud and the Blood would be an ideal ruleset.

Despite the niggles, I did think the book is a very worthy read of an otherwise neglected campaign and I'm very glad that I got the opportunity to read it as we enter the centenary period.

The book will soon be winging its way to that devil Mr Rousell - enjoy!

Friday, 13 September 2013

Book Review: The Spanish Holocaust by Paul Preston


The Spanish Holocaust: Inquisition and Extermination in Twentieth-Century Spain
Paul Preston, first published 2012


I picked up this book on a whim and with a money-off voucher while mooching about the tiny history section of the WHSmith in the soul-sapping Westfield shopping centre. Before I start my review, let me be clear what I was looking for, as it affects my thoughts on the book. I was after a decent introduction to the Spanish Civil War as a whole, covering the political, military and social aspects of the conflict. When I picked the book up, I knew little beyond the Curt of Analogue Hobbies' wonderful miniatures, AARs and intelligent posts on the subject.


A group of Curt's fine Carlist Requetes, used with permission

The cover includes many encouraging plaudits and quotes, with it having won Sunday Times history book of the year. Finding it in the pitiful historical section in a high street shop, I mistakenly assumed this book would be what I as after. I was quite wrong!

As the title suggests rather more obviously that I had realised, this work of 700 pages is a comprehensive review of the repression of POWs, political figures and innocent civilians by both the right-wing Francoist military rebels and the Republican regime of predominantly Unionist, Communist and Anarchist organisations. The author clearly wants to set the record straight on which regime was more repressive, using statistics to prove, seemingly beyond doubt, that the Rebels were more repressive by an average of three times the number of individuals murdered. The author calls the repression the 'Spanish Holocaust', his own term and an emotive one that he carefully justifies in the prologue. This is organised by locale and by region and presents statistics based on the latest research available to modern historians.


A Spanish Civil War propaganda poster, courtesy of ALBA

The book makes clear that repression in rebel-controlled zones was planned, a staggering strategy of extermination, despite the Francoists' propaganda claims that they were only responding to incidents of 'red terror' and that they used appropriate legal processes. The claims of 'red terror' were outrageous propaganda based on exaggeration of real events and outright invention and claims to use legal processes were clearly an outright and deeply hypocritical lie to generate support for their cause. The disturbing litany of Rebel atrocities was helped by happening in remote areas, far from neutral observers, which in turn helped Franco obtain/retain the support of more of the international community, Spanish elite and Catholic Church.

In comparison, while there were atrocities in the Republican zone, these are presented as mostly being in response to Rebel actions such as bombing raids on civilians, being encouraged by agents provocateurs and and not being centrally coordinated. In fact the author documents the many attempts to prevent atrocities by individuals and the Republican government. With its revisionist aims, the book goes to great lengths to attribute responsibility to individuals or organisations for particular atrocities on both sides, wherever possible, generally having more success in the Republican zone due to the superior records of the crumbling state (despite some clumsy attempts by the Madrid Junta to conceal later atrocities) and the larger number of international diplomatic and non-governmental observers.

Another propaganda poster, courtesy of ALBA

The structure of the book detailing repression region by region lends itself to a repetitive feel, presenting the Republican repression before the Rebel advance, then the much greater, planned and brutal Rebel repression, before singling out a few, usually two or three, examples which are notable for the profile of the victims or the scale or brutality of the atrocity. I found the most interesting chapters were later in, particularly chapters 9-11 (of 13) on the atmosphere and events in Madrid in the year before the end of the war and the sections on foreign support for each side, particularly Nazi Germany's material contribution and its hunt for German exiles, as well as the Soviet Union's illicit activities in Madrid and Barcelona to hunt and eliminate 'Trotskyists'.

The book is clearly written for people with a solid grounding in the subject. The progress of the war and specifics of the Rebel and Republican forces are barely covered beyond generalities, for example the Battle of the Ebro is referenced, but never expanded upon. There are a colossal number of individuals mentioned and they are given the briefest introduction so I found it hard to make sense of who was important and who wasn't in the wider context of the military and political conflict. Some are referenced again many pages after first being introduced, with only the briefest of memory jogging. The turbulent events meant there were scores of acronyms for organisations on both sides, as well as the authors' use of many Spanish terms like 'sacas' (seizure and extrajudicial killing) and 'checas' (informal police forces and detention centres) throughout. There is a glossary at the back but the author could at times have made it easier for an unfamiliar reader: I found the term 'fifth column' and 'fifth columnist' first used many pages before it was described what the term meant. This all adds to the sne the book is quite specialised, but despite a few niggles, that I was able to follow the narrative fairly well is testament to the quality of the writing.


And in miniature, Curt's female Anarchist 'Milicianas'

The book seems to close quite suddenly, whisking through the ongoing repression in the years immediately afterwards and fate of those who had fled to France after its all to Germany in the Second World War. The coverage of repression throughout the rest of the Franco regime was in a similar format: statistics and case studies, but seems very brief, which is a little jarring compared to the heavy detail in earlier chapters. The final chapter, 'The Reverberations', covers the re-writing of history by the Francoist regime and national movement for the recovery of historical memory' from the early 2000s and some reaction to this. the chapter also covers some examples of the guilt of the oppressors, tracing ten or so case studies, including some occasions where perpetrators apparently get their 'comeuppance'. But there is little significant effort to draw conclusions on the effect of the repression on modern Spain, which I had expected given the apparent expertise of the author.

One of my comments was going to be the lack of a map of Spain, as the stats are broken down by both town and region and my knowledge of Spanish geography isn't good enough to make sense of the progress of the war and repression. But about halfway through, I found a series of maps and graphical summaries of the repression in each region described in the text, both in an Appendix nestled between the substantial Notes and equally substantial Index. I would have preferred the maps in a more obvious place at the start of the text. While the book contains two eight-page sections of black and white images, these cover a faction of what the text covers and were difficult to contextualise, not being referenced in the text and often appearing many pages from where the individuals/organisations are first described.


Pablo Picasso's work Guernica, created in response to the aerial bombing of the town of Guernica in April 1937, image courtesy of Wikipedia

In conclusion, I wouldn't be able to recommend this book to someone in my position: new to the field and looking for an overarching introduction to the military, political and social conflict. It certainly is not (and does not claim to be) a general history of the war. Understandably, its focus on the brutal repression offers little 'wargaming potential'. That is not to say I didn't get anything from the book: I found it powerful and deeply disturbing and learned a colossal amount about its subject matter. Even in my inexpert view, it is clear that this is a meticulously resourced work from an British historian who is clearly an expert in the field. It is more of an academic work, providing the statistics of the repression as best can be accounted and based on the work of many historians, all drawn together into one coherent book. To present such challenging material in such detail yet remain accessible is extremely impressive. The quality of the referencing is exceptionally strong as of 700 pages, 530 cover the text and a substantial 170 covering a glossary, notes, appendix and index. The author naturally draws heavily on Spanish source material, including many first-hand accounts and the work of modern Spanish historians.

I greatly respect the book as a modern history and attempt to set the record straight through clear presentation of facts, statistics and assessments, based on meticulous research. For those with a reasonable grounding in the conflict and who are looking to learn more about the repression of the conflict, or students of early 20th century history and fascism, it would appear to me to be an essential work, particularly for English-speakers, drawing as it does on so much original Spanish-language material.

Wednesday, 10 April 2013

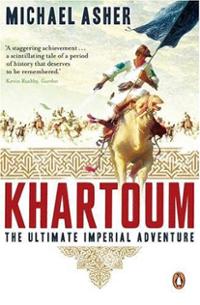
Book Review of Khartoum: The Ultimate Imperial Adventure by Michael Asher


I've just finished Khartoum: The Ultimate Imperial Adventure as the first serious (i.e. not googled!) reading around British involvement in the Sudan. And did I pick well: I can happily say it was an exceptional introduction to the conflict. Michael Asher has a very entertaining style and really brings the conflict to life, making the book hugely readable. His description of battle scenes is particularly good for a serious historical text, balancing the strategic, tactical and noteworthy individual/unit actions. 

The initial chapters cover the seeds of the uprising really well, clearly explaining the background of the Madhi and touching on some of the tribal structures, trickier subjects to cover briefly for a Western reader. This helps explain how the situation developed and was exacerbated by early Egyptian and British actions.


The political background and events of General Gordon's mission to evacuate Egyptians from Sudan gets well covered, as dies Asher's assessment of his and character and decisions. Also well covered is the Suakin campaign, which is noted as achieving nothing but Asher feels was a missed opportunity. 

On the 'Gordon Relief Expedition', there is a significant focus on the Desert Column, with the River Column barely mentioned. I admit I know little about the subject, so for me , it would have been nice to cover the latter a little more even if the Asher felt the Desert Column deserved more of the glory. This is one of few areas where I felt Asher may have misjudged and that I want to find further reading on. The impact of the failed expedition, particularly for UK politics is neatly covered too.


General Gordon, source

Asher seems to want to set the record straight on certain individuals they he feels were unfairly slighted after the events, particularly Wilson and Gordon himself. Others he clearly thinks little of. Asher's opinions are clear, I'd be interested to see if other eminent historians differ! 

The section on the reconquest and Omdurman campaign is briefer, feeling almost like a postscript to the previous events. But it is covered adequately to provide closure which feels right for a book which majors on Gordon in Khartoum. 

There are multiple clear maps of the region as well as of major battles, which are all very useful. There are also a number of images that really help to bring both characters and era to life. Obviously the author is helped that this comes from a time where journalists and illustrators joined British forces to capture the moment with relative accuracy and from when there are lifelike portraits of individuals on both sides available. 

In closing, Asher draws some links to the modern age, perhaps unnecessary in the context of a modern historical  text on the conflict, but it does draw out the relevance of the conflict quite succinctly and neatly. However this postscript seems a few years old, so I wonder what Asher, who is presented as an expert on Sudan, might have to say on more recent events in Darfur and South Sudan. As well as notes and a solid bibliography,  the book ends with a 'what next' for most of the main personalities, even the steamers and railways that feature which was nice to close on. 

I learned a huge amount from Khartoum and it had really filled me with enthusiasm for my own Sudan project - more on that soon! 

Highly recommended. 

Sunday, 7 April 2013

A dabble in Force on Force: AAR and first impressions

The other weekend, Samulus and I also managed to grab a game of Force on Force, with Samulus providing the rules and miniatures. We played a small scenario, three modern Russian fireteams against two of US Marines. It was a rescue mission, with one Marine fireteam pinned down and the second coming to its rescue. 

Setup, the marines are pinned in cover between two Russian fireteams. In the background, Samulus wrestles with the rulebook.


A third Russian fireteam advances

Hummm, this village looks familiar...

FoF uses different dice, (D6 through D12) to represent the varying levels of combat ability of different troops (though ours were all D8), with once dice of firepower per model and bonuses for support weapons. This is done as an opposed roll with 'dice matching' to determine the number of hits. Curiously, Pulp Alley which I've also been playing recently also uses similar dice for quality and opposed rolls system. Cover and body armour generate extra defence dice. It also has models be knocked down and still contribute to firepower/defence, with the results of the damage determined at the start of the next turn. 

The first few turns had our Marines taking a lot of heat, but spectacularly passing many of their recovery rolls, much to Samulus' frustration. But eventually, weight of fire means one is killed and the other three sustain light wounds.


I liked Samulus' little wound markers

After, the second US fireteam  (top) comes to the rescue of the beleaguered Marines, some solid fire putting heavy damage on one, then a second Russian squad. This forced the Russians to retreat, allowing the US to medevac their casualties.


My thoughts on Force on Force? First impression is that it is a serviceable ruleset, once we'd realised we were playing the initiative rules wrong. It encourages defensive play, with the cover bonus being invaluable so you tend to hunker down in cover. This felt accurate, but didn't make for a thrilling tactical game! Damage seems to rely on bad defence rolling, so can be a bit fickle, though we had spurts of luck which might have slanted things in our game (me with recovery rolls then Samulus later rolling some dreadful defence rolls!). 

On the initiative, Samulus held it all game as he had bonuses from holding it the previous turn and for having more fireteams. So we didn't get the most of that changing hands and I was always the reactive player, which was frustrating. Our forces definitely seemed too small to get the most of the game. 

With it being our first game there was much rulebook-flicking, unsurprisingly, Samulus felt the rulebook could have done with better organisation, though I can't elaborate on that! Once we got the hang, we mostly relied on a QRS that I found on the FoF website. We never did find the rules for Drones, despite having a recon drone model available.


A drones-eye view

I liked the simple combat mechanics of dice and opposed roll and the later recovery roll was useful to balance the numbers of dice rolled in combat rounds as well as evoke the chaos of combat, where the severity of wounds aren't immediately clear. It did feel odd having a skirmish game just add the same dice for specialist weapons (quite unlike Operation Squad!). While I don't think it is wildly original ruleset, I could see it being a serviceable with bigger forces, particularly with good scenarios and more terrain to discourage defensive play. 

Anyone else played FoF and have thoughts to share? 


Saturday, 9 March 2013

Pulp Alley AAR: The Tomb of Ahmet Ra

Last month, Gharak and I managed a few test games of the recently released Pulp ruleset 'Pulp Alley'. We both threw together leagues and raided Gharak's extensive terrain collection, with limited prep time. Rather than using the Professor and his chums (who are still mid-story, last played using .45 Adventure), I used my second league: the 'Societe Archaelogique'. Led by Jerome Lefranc, who previously served with the French Foreign Legion and is now an expedition leader for the Societe, with his Hungarian sidekick Andriy Shukhevych. They were joined by the beautiful, young and enthusiastic Veronique Dujardin and mooks Gerard and Joseph. Rounding out the group is Gustav, Andriy's diminutive but unexpectedly ferocious dog.

They were opposed by Butch Sullivan's League of Adventurers, featuring the brave, talented and ever ready Butch Sullivan, his partner in crime Lauren Stone and regular adventuring buddies, Kazim of the Umbaku tribe, Marcus, Akhmed the eagle-eyed and Indiana the dog.
Our first game took our two groups of adventurers to Egypt, to locate the lost treasure of Ahmet Ra. Butch Sullivan's League of Adventurers have had a tip off from an anonymous caller as to the whereabouts of an undiscovered and unplundered tomb entrance. 

The major plot point for this scenario was the Colossal Tomb of Ahmet Ra, and the minor plot points were; Ceremonial Hieroglyphs, Disassembled Survey Equipment, The Jeweled Orb and Smuggled Explosives.

Writeup by Gharak (lightly edited by me, also available on his blog), photos by me.
Andriy and Joseph move up towards one of the the Orb, Akhmed lives up to his name and takes a shot at Joseph, wounding the Frenchman. Looks like he may be down for a while.


Moving up through a perilous area of old crumbling pillars, Lauren deftly dodges out of the way of some falling masonry and makes it through safely.


Andriy reaches out to grab there sacred Orb, a snake slithers out from among the trinkets and rears up to strike. In a show of reactions and strength, Andriy strangles the beast with his bare hands. Collecting the orb he stashes it safely and takes cover behind the plinth.


Butch make his move forward and stumbles on something buried beneath the sands, kicking the dirt aside he uncovered a discarded crate, the markings on the sides suggesting that the contents are explosive. Likely to come in useful, with a swift boot Butch smashes through the lid and retrieves several sticks of dynamite. Meanwhile, Lefranc aims round the crates he was taking cover behind and downs Kazim with a single shot as he makes his way around the sphinx.


Veronique makes her way over to the crates and reassembles the surveying equipment and she soon moves away back to cover.


Gustav makes a brave attack on Indiana but the larger dog clearly has the advantage and comes off better.


Lauren edges along the side of the Sphinx and taking aim she squeezes off a shot against Veronique, with an heart-sinking click Lauren realises that her pistols are out of ammo and the chance is wasted. Nearby an enraged Indiana rushes Gerard and the two engage in a deadly melee.


ReEloading, Lauren moves up to provide cover but Andriy quickly closes the gap and charges,  but the nimble adventuress deftly breaks away from his attack.


Butch seizes his chance and makes a dash for the tomb entrance, lighting the dynamite he steps out of the way and a mighty explosion destroys the seal and grants entry to the treasure inside.


Butch and his team recover the lost treasure of Ibis from the tomb of Ahmet Ra.


Closing Thoughts

I really enjoyed Pulp Alley. It is quite a simple ruleset, using the dice type and number of dice rolled to pass a test to differentiate between different characters. The standard role is to get multiple successes of a 4+ and the dice range from D6 to D10. Combat is done via 'dice-matching', giving one player the advantage of choosnig how to match them up. It has an asymetric turn order, with the initiative sitting with one player, who can choose which player activates a model next. Initiative is passed when wounds are incured or plot points succeeded, which reminded me a bit of a reverse 'turnover' in Blood Bowl, on success rather than failure.

Also, each player has a hand of cards (like 'Stay Down' in the first picture) which serve as both random events and extra challenges that you can play as 'perils' at certain points. Leaders and sidekicks are notably better than lower-grade characters, so you need to concentrate attacks on leaders to wear down their defences and do damage.

It is a better ruleset for two players than .45 Adventure and no need for an umpire. This meant both Gharak and I can run competing Leagues, saving Gharak from his usual role of 'playing the scenario'. The scenario generation is quite nifty, created by a series of rolls on tables to generate the 'plot points'. That serves as an outline from which Gharak and I work out the whys and wherefores. Some of the tables are a bit odd (covering more science and weird than the Indy Jones-type adventuring we do), but we were happy to re-roll a couple of results to get something more suitbale and could easily re-jig the tables themselves to suit our purposes.

Also worth mentioning the great presentation of the ruleset, it has an really neat 'Pulpy' style and is chock full of inspiring sketches. All in all, a really fun ruleset and most recommended. Its ease of play and focus on fun and great scenario generation means it will become our Pulp ruleset of choice. 
  

Sunday, 3 February 2013

A Terrain Distraction: 4Ground Tree Bases Review


I recently picked up some of 4Ground's laser cut wood 'Tree Bases'. I thought they looked really useful, were well priced at around £1 each and while restricted to the shapes they sell, would save an age cutting my own out. I hoped them being two layers of wood would mean they wouldn't warp when sanded and flocked. I do like that the base inserts can be pulled out if you wanted to put more miniatures in, particularly when using formed units. Also, different terrain could be switched in and out by building a variety of the 60mm inserts so I bought an extra pack of 60mm bases to do so.

Image from the 4Ground site

Happy to say these were a smashing success! I made half up as trees, using Noch ones I had in stock. These trees are a tad small for 28mm, so I'd like to get a few bigger trees to mix in. The woods are also a bit sparse for thick woodland, I was reluctant to glue any trees to the base to make them as adaptable as possible, though I did liberally apply rocks, hedges and tufts. I might add a few trees to 2ps which I can drop on top. Of could these and the inserts could also be used as scatter terrain without the bases.


I also made some as simple 'rough ground', for Sudan or Spain. These were a doddle, I just used rocks and bits that I had in stock. One thing I did to each bases was sand the sides down at an angle and apply some wood filler, to avoid having a 'stepped' look. This is optional but I'd recommend it to make them look their best, while it took a bit longer, it was still less than making the whole base from scratch.


Pros
-tough and durable, no warping at all.
-adaptable, both in terms of different terrain types and removing pieces in-game to accommodate miniatures.
-inserts can still be used as scatter terrain
-for smaller scales, I think a bit of work could be make them into pretty decent hills.
-really well priced at 90p or £1.20, can't argue with that!

Cons
-I felt the needed some time sanding and filling to make them look their best.
-only two shapes available
-larger sizes would be good for 28mm scale gaming

I'd like to make up some trees on 2ps, larger trees on 60mm inserts as well as some tall rock structures to get a bit more height and make more 'blocking' terrain. I think I could do a few more adventurous things too, perhaps overgrown ruins, or something in an archway shape which connects two of the inserts. I also want to apply hacksaw and imagination, discard the inserts and make them into a pond or marshy ground.

Thursday, 31 January 2013

Operation Squad: Brief AAR and Review

Quick post tonight to note a great first game of Operation Squad with Samulus. We took reduced squads, me with 8 (freshly painted!) German infantry and Samulus with 8 British commandos.

It was a game of two halves, the right half of the table ending up a troops hunkered down in cover sniping at each other. Perhaps my fault for not putting more blocking terrain down. The centre was dominated by two buildings and I managed to get a well-positioned MG34 to keep a large building full of Brits suppressed. Well, cowering at the number of shots I could throw out, at least!


MG34 team heads for the rooftop

Surprise! Sarge guns down a rampant German


The game ebbed and flowed well and before we realised it was late enough and our forces were dwindling and routing, so agreed it was a draw.


Disaster! MG gunner fails his break test and leaves the field. It was a still a draw despite this setback, honest! 

I really enjoyed Operation Squad. The action/reaction mechanics initially needed the application of braincells, but flowed better after a turn or two. The game encourages you to use squad tactics and have your troops work together.

Pros
-designed to encourage squad tactics, captures the feel very, very well.
-elegant mechanics, the way MGs worked we thought was quite excellent.
-makes for a tense game, some dice rolls really matter, which is fun!
-I think the core mechanics would work well for Weird WWII, with tinkering and adding some different flavours of troops, without breaking the core mechanics.

Cons
-requires both players to pay attention or it can go quite slowly
-some scenarios not explicitly covered by the rules
-restricted squad lists (easily solved by the application of imagination and scenario design!)
-long ranges require a lot of terrain, echoes of my Infinity days here
-uses quite a few counters, unless you've got a good memory!

So after one game, my feeling is definitely very positive and I look forward to trying new things out like mortars and Panzerfausts. If you're aftet a pick up and play, small scale squad action game, I'd recommend it!

Now, can I justify some more suitable 4Ground buildings?

Friday, 14 December 2012

Book Review: All the King's Men by Saul David

I picked up the attractive-looking hardback 'All the King's Men: The British Soldier from the Restoration to Waterloo' earlier in the year when it was on offer in  my friendly giant high street book chain. Purporting to be a 'compelling and vivid portrait of the British Soldier from Blenheim to Waterloo', I was expecting a slightly different perspective from the usual military history fare.

Unfortunately, It didn't really succeed at separating itself from its rivals. While it is well written and perfectly readable, I didn't find it added much of a different perspective at all. In fact, it seems to present something of an idealised view of something very different to the British Soldier: their finest generals: Marlborough, Wolfe and Wellington.


It details their brilliance, campaigns and occasional errors in some detail. But it is also frustratingly inconsistent. Some campaigns and battles are heavily detailed, some are barely referred to. There are precious few maps, many more would be welcome though those that are present are clear and appear well-drawn to my inexpert eye. It also takes huge tangents to offer context. It details Wellington's early life and Political career, which aren't hugely relevant to the prowess of the lowly infantryman under him. It also details the biography of military rivals, perhaps as a counterpoint: particularly Washington and Napoleon. Napoleon's rise and the French Revolution take up a substantial segment, despite being very heavily covered elsewhere. These don't really offer anything more than context to the thrust of the book. I think it gives undue weigh and words to the life and career of Napoleon, given the subject of the book is the British solider, not French!

There was no analysis of made British infantryman different, or better than his French, Prussian or American equivalent. It claims the British were the finest, despite their tendency to loot and pillage, but offers no real evidence to back up that assertion. It notes they lost the American War of Independence but 'learned to adapt (and) hadn't lost their ability to fight', one of many general and sweeping judgements. It barely touches on the life of an infantryman, their training or experiences and how these changed. While there are some first-hand accounts, chiefly from the memoirs of infantrymen, they seem to be those quoted in other modern histories, rather than anything unique.


Covered, but I'd prefer more about the British, thanks!


It is a very readable primer, but not something for those well-read In military history. I found the earlier sections illuminating, but more as I'm less well read on the War of the Spanish Succession and American Revolution. Given all three are well covered by military history books in English, I think you would get more depth from a specific book on each subject. Perhaps I'm being unfair and expected something that this book isn't really meant to be. As I note, it is well written and and an enjoyable as a light introduction/overview. But 'All the King's Men'? More like 'Three of the King's Men'.

Wednesday, 17 October 2012

Short review and painting: Sarissa Precision Adobe Cantina

For the Secret Project, I bought a couple of the Sarissa Pecision Old West adobe line. I figured they were useful for a whole host of different games. The centrepiece was this two-story cantina. These are the bits out of the packet: basically, lots of precision-cut wood and a small instruction sheet.

I made two initial choices: to paint it unassembled (which is rare for me) and to leave the wooden boards the colour they were. So I started by dong a quick dry assembly to figure out how it went together before spraying everything that wasn't to be wood lightly with white spray primer. I split the walls into two batches to paint. Stage one was to pick out the brickwork in watered Vallejo 'Earth'. I used different consistency of paint and brushed it on lightly to give a varied texture. This avoided me doing any highlighting, but I may go back and dry brush some lighter shades on to reduce the contrast between the two colours. Stage two was to use watered down Vallejo 'Buff' on the lower portions of the walls and going up where walls would adjoin each other and other shaded areas (like around the beams). Here we are at stage two of the first batch:

Moving on, the walls got three highlights with 'Buff' mixed with white, up to a just off-white at the very tops. At all stages, I kept the paint quite thin to speed up the painting.  

Assembly now. I started off with superglue - don't bother! White glue works much better. The pieces all fit very snugly together. In fact, they can take a bit of jiggling and force to get them into the slots. I was a bit worried about breaking the thin pieces, but didn't so they much be quite sturdy. Getting them to fit in the right order is sometimes tricky, so test each piece before gluing.

Part assembled, I used elastic bands to hold the walls in while the glue dried. Probably not necessary, but a bit of a precaution.


And here we are assembled from the back and front. Quite an impressive building for its size. It also came with a ladder for roof access and I cut the doors out and mounted them on balsa-wood to make them openable. The kit was £18, a very reasonable price I thought!


I left off some of the window shutters of mine, but may add them later. You may notice that the second floor doesn't sit right from the back. For some reason the 'pins' holding the second floor on res on the beams rather than in the slots. So while everything else out of what was a pretty complex kit fit perfectly, these didn't. I emailed Sarissa these pics and they couldn't explain it either - apparently other kits in stock were fine and apparently I'm told I hadn't fudged the assembly either! Perhaps they were just being nice. Sarissa sent me another kit by way of apology - so full marks for customer service. In fact, service was impeccable, my order was dispatched very quickly and questions were answered promptly. With the price and custome service, I wouldn't hesitate to use Sarissa again, even among the booming laser-cut terrain market. Rather than leaving the unsightly gap, I fixed the issue with my kit by just clipping off the tags and filling in the slots with discarded tags. This worked fine and those particular noggins didn't seem important structurally - the rest of the structure, particularly the internal walls holds the second floor on.